Posts filed under ‘Gifts’
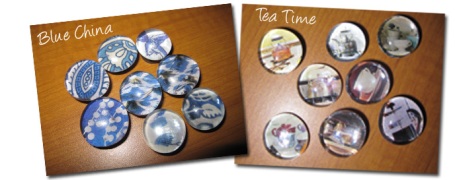
Glass Bead Magnets
This isn’t a new idea by any measure. If you’re any sort of a crafter I’m sure you’ve at least seen this before (if not made dozens for your fridge already). But hey, we don’t judge… if this is the first time you’ve seen these ridiculously-easy magnets, we’ll take you through it step by step.
1 – Look through magazine to find photos, patterns, or words you’d like to see every time you walk by the fridge
2 – Put a small dollop of clear glue on the flat part of a glass bead
3 – Place the bead on the picture & press real hard until there are no air bubbles underneath.
4 – Once it’s dry (you can flip it over without the bead falling off), cut around the bead & glue a magnet to the bottom.
Tah-dah! That’s it!
We like this craft a lot because it takes zero concentration so we can chat all night! We’re not fooling anybody, that’s why we’re in this anyway.
Snowflake Cards
Samantha’s Snowflakes Guest Blog: (with notes from Lauren. Hi!)
Last year a couple of my friends and I decided to make homemade cards for Christmas since we were all a little strapped on money and we’re rather crafty. I liked doing it so much that I decided to make them cards again this year! (Ok I know Christmas is over, but Sam didn’t give me the card until Christmas… so by the time I squealed “You have to post this on our blog!” & she had a chance to write it, it’s a little late. Deal with it. 🙂 It still snows in January!)
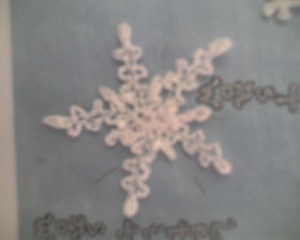
First I made the snowflakes that I found patterns from on Hobby Loco and used their snowflake patterns 2, 3, and 4 under the crochet link. I also found a few on Martha Stewart. After I made six (three for each card), it was time to make the card. (Why didn’t I take pictures of the full card?! I was so excited about the details of these intricate snowflakes… just use your imagination?)
(If you didn’t catch it from the websites, after you stitch the flakes they get dipped in glue to harden & hold their shape.)
I’ve made loads of my own wedding invitations, so I had a few hundred pages of cardstock ready to go. I chose white, because it was close at hand, but I’d recommend using color if you don’t feel like coloring. After coloring the paper, I cut it down to fit on top of the card with about 1/4″ of the white card stock showing as a frame and stuck it down with scrapbooking tape (or double sided tape). I would have used glue, but I already had the tape.
Do you notice a trend here? I use what I have on hand. Just call me the Cheap Crafter or Thrifty Threader if you’d like. Ha. Back to the craft…so I used some crochet thread to help fasten the snowflakes to the front by literally sewing them on. The bigger snowflakes needed to be attached in two places, but the others only one.
Each was tied down with a tiny bow that you can be seen on the other side. At first that wasn’t what I wanted, but then realized it made it easy for the recievers to see where to cut off the snowflakes. In the inside I wrote at the bottom left *Detach snowflakes to use as a Christmas decoration!* (Sam clearly doesn’t have much faith in us)
I continued to decorate the front with “Let It Snow,” written all over with little stars (*) all over the place in a silver Sharpie to go along with the icy cold theme. I hope they both enjoyed them as much as I enjoyed making them. (We did.) I think next year I might make more for family and friends so they can have a touch of snow in the mail.
Memory Maps
Before I even get started let me just say this is the last post made up of crappy camera-phone photos! You can all thank Momma-Dubbs for a new camera for Christmas. But endure this last post of grainy, highly photoshopped pics.
This is a Lauren-project that were Christmas gifts for 2 very close friends because I wanted to document & remember some of the good times we’ve spent traveling together. I looked high & low for travel memento ideas but came up short. If I would have planned in advance I love these from Martha Stewart but now that it’s in the past all I really have a photos.
Photos! Duh.
I grabbed a framed corkboard & push-pins just like any travel map but decided to add as many personalized details as possible… starting with photos. This is so easy but makes an big impact. I measured the head of my push-pins, sized tiny photos of us to fit, cut them out & glued them.
These photos weren’t even from our trips, but look how cute they are! (if you squint maybe you can get the general idea. haha sorry!) I used super glue for reasons we won’t get into right now, but it worked just fine & will obviously be secure. If you have ideas for a better adhesive please share your comments.
I custom printed the maps because I happen to work with teenager who run a poster press & have really great prices, so I was able to customize that as much as I wanted too. I tried to make the map colors look antique-ish, added a family scroll, and some old-school explorer type images I found online.
I also tried to connect the 2 separate gifts together since the 3 of us are really a package deal. So when I covered the frames & added a block of cardboard to hold extra pins, I alternated the fabrics. So Fleegal has some fabric from Sam’s frame & vice versa. Also, I only mapped out OUR travels. They’ve been plenty of other places & I’m sure they’ll have fun updating all their separate memories, but for presentation purposes this was a map of us.
This is my map, but make your travel map your own unqiue creation! If you’re a big roadtripper, try using yarn to mark your route. Maybe cover the frame in flyers & brochures you acquired. Happy Trails!
“Twenty years from now you will be more disappointed by the things you didn’t do than by the ones you did do. So throw off the bowlines, sail away from the safe harbor. Catch the trade winds in your sails. Explore. Dream. Discover.”
– Mark Twain
Baby Shower Gift
Hi! This is Amy today! I’m sharing one of my recent craft projects. I hope you enjoy it! If you have any questions, just leave Glitter Blessings a message!
I was invited to a lovely lady’s baby shower. Unfortunately, I wasn’t able to attend, but I was able to mix a little craft-blog idea with a little of my own creativity to make a cute, handcrafted gift I’m sure she won’t receive doubles of, registry or not!
Here are all the pieces.
The bow: inspiration –> here at How About Orange; my creative touch –> I didn’t have any magazines I really wanted to use, so I used wrapping paper. I had a roll that was at the end, with not enough to wrap with but too much to toss away, so I cut my strips from there. I then used a pink sharpie to write on the shiny side of the paper for an extra personal touch, which included phrases such as “Mom ♥ baby” and their names.
The bracelets: They are almost matching mommy-baby bracelets/anklets. Mom-to-be will hopefully get lots of use out of hers, however, when baby comes along, she won’t be able to wear her anklet/bracelet unless she’s being carefully supervised because babies can turn anything into choking hazards. This might just be the most useless gift mom gets from the baby shower! But it might also be the cutest, too! I’d like to say the idea was all my own creativity, but Brandon helped some, too!
The magnets: the inspiration –> here at Not Martha; my creative touch –> well, there really wasn’t one. I just used pictures I thought she’d like and a different 3-in-1 clear craft glue; my creative thinking –> those little buggers grow up so fast then they start making artwork for mommy and daddy and bringing home A+ papers. Mom will surely need something to hang them with!
The box: the inspiration –> seeing many blocks on baby websites; my creative touch –> make a box to look like a block from cardstock, complete with baby’s initial, stars, and glitter. Inside, I placed the magnets.
The card: I didn’t have any website inspiration from this. I thought of the idea on accident. Children like stories, stories have words, cards have words, so why not make a storybook card? All I did was cut two rectangles from cardstock, stack them, fold them in half, staple the seam, and cut 2 pieces of white ribbon to be the “binding.” Then, I wrote on it with pens and markers. It sounded neater in my head than it actually turned out, but that’s okay.
And here’s the finished product.
I think she liked it, and I hope you liked reading about it because I know I enjoyed making it! 🙂
Cozies
Easy, inexpensive, useful, handmade Christmas gifts… check!
I’m making coffee cozies for friends & coworkers this year (hopefully none of whom check this blog regularly… surprise!) Whether it’s for coffe or tea, I’m sure most of us have gone through more of these than we’d like to admit:
 I don’t think most people would label me in the tree-hugger category, but why waste when you don’t need to? It just makes sense. These cozies can be used over & over, so customize it to your friends’ style & make something they’ll want to hold on to.
The construction is incredibly simple. Start by grabbing fabric from around the house or hit up Goodwill like I did. You’ll need a thick material for the cozy to protect their hands from the heat & extra fabric for embellishing.
My sweater’s sleeves happened to be the perfect width, but you can also trace a cardboard cozy for the right shape & size. Since I went with the sleeve I didn’t even need to sew up the seam! I only used a few fabrics & was able to make a variety. Look around the house for buttons, beads & ribbons to add fun details.
My suggestion: Put the cozies ON coffee to-go cups so your friend understands what they are. “Thanks for the… wrist warmer?” You could even fill the cup with coffee beans or tea bags to round out the gift!


Recent Comments